Building your own Chocolate Fondue Machine
| WARNING: The details listed below can kill you if you are not careful. They can do other things to you too, but killing you is the most extreme. If you do not know what you are doing, get help from someone who does. Even then, make sure you use a Safety Switch and never work alone! |
Introduction
This page describes what we did for the 2014 HACKAGONG in Wollongong, where we used our Internet Of Things skills to do something for good rather than for evil – to manage a Chocolate Fondue machine. After all, we figured, it was about time that Chocolate Fondue Machines were properly controlled (and controllable) over the Internet. We concentrate on the Hardware and Firmware side, on the assumption that the people who will be reading this will be mostly software people with experience building front ends.
This page does not necessarily describe best practice – just how we did it in a 30 hour event. And we don’t describe everything – just enough so that others can take what we have done and build something equally as awesome
Block Diagram
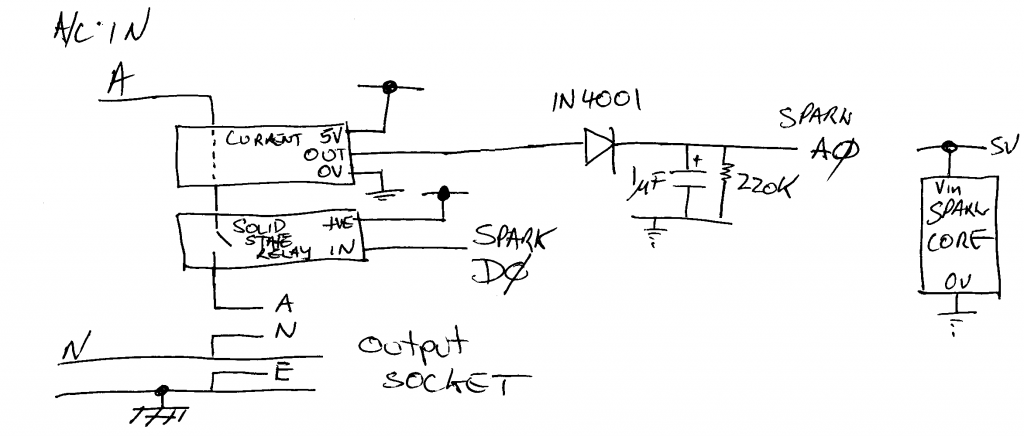
Here is the Circuit Diagram for what we built. Unfortunately, if you cannot work out what this means, it is probably not safe for you to be building it. I walked into the event having a fairly good idea of what I wanted to build because unlike software projects, you cannot just download electrical components from the Internet. In fact, the current sensor needed and power supply needed to be flown in from overseas as I did not have these in stock, and the solid state relay needed to be ordered from a local supplier. Normally the Spark Core would need to be flown in, but I had some in stock. 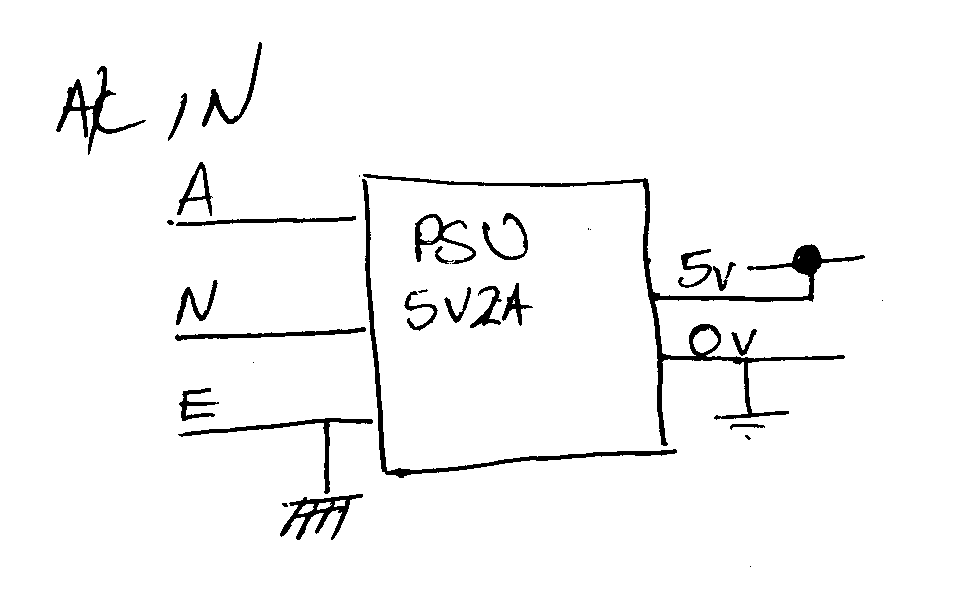 .
. 
Power Supply
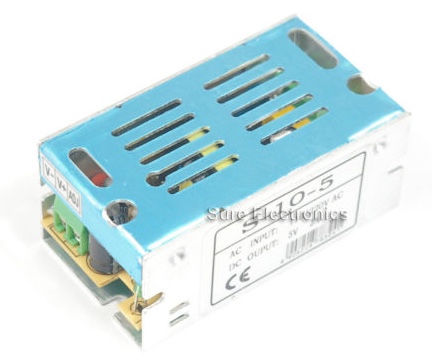
The power supply was a 90-270V input frame switching power supply, purchased from AliExpress or eBay. It outputs 5V at up to 2A. It takes Active (A), Neutral (N) and Earth (E), and outputs Ground and 5V.
Current Sensor
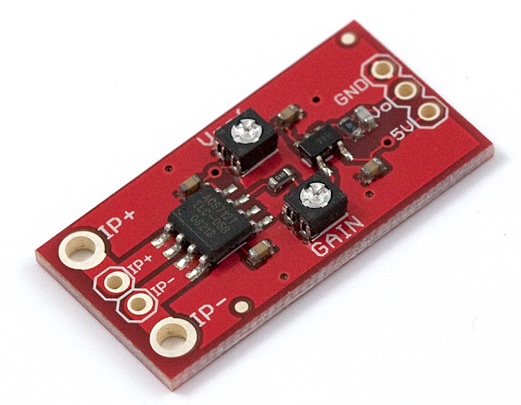
The Chocolate Fondue machine consumes about 80W to melt the chocolate. Once the Chocolate is hot enough, it cuts turns the heater off until the Chocolate cools down slightly, whereupon it heats up again. The hardware that does this is called a Thermostat. In order to calculate how much energy the device is using, we need to monitor the power that the device is consuming. Since we are only consuming 80W, accurately measuring the current, and therefore the power can be difficult. Therefore, we put in a few cheats.
The current, just like the voltage, is alternating at 50 Hz. Using special hardware, we can monitor this waveform in a CPU using an Analog Input. The problem is that it is at 50 Hz. That is, the signal is constantly changing and repeats 100 times a second. Realistically, you need to monitor this signal at least eight times per cycle to get any information, and many more times than that for accurate information.
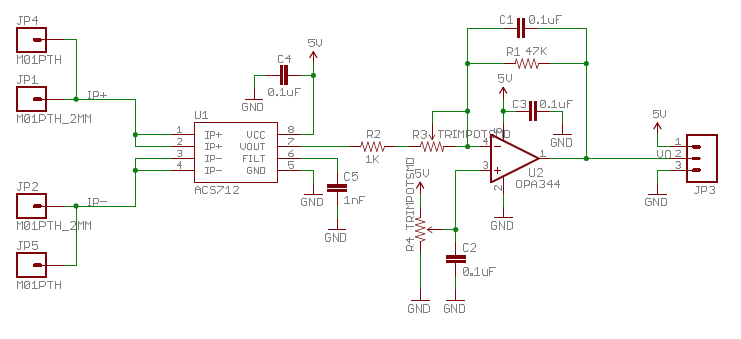
So, the first thing we did was use a current sensor with an internal amplifier to increase the level of the incoming current signal, and used a large amount of gain as well. This gave us a signal that we could work with, but we were still left with needing to monitor the signal at least 400 times a second. What we did next was added a rectifier and a low pass filter to the output. Crudely, what this does is detects the peak of the current, and when it is detected, it keeps using it for about a second. By using three or four very cheap parts, the complexity of the software is significantly reduced. We only need to monitor the current once a second or so.
But this is not ideal, since it builds errors into the system. In our case, we know that the Fondue Machine is rated for 80W, and will consume either 80W or 0W depending on if the thermostat is on or off. Through experimentation, we found that the value returned by the Analog Input of the processor was about 3200 if it was off, and 4300 if it was running. Therefore, we made the assumption that any reading above 3750 (Half Way) would be 80W.
Normally, you would need to worry about the connecting the same part to between the AC and low power parts of your circuit. In this case, the chip used on the board provides an isolation of over 2000V RMS, well above the 230V RMS used in Australia. I am not sure I would trust the SparkFun PCB to 2000V since I am not sure about the details of their design, but I am sure it provides more than enough isolation for my purposes.
Solid State Relay
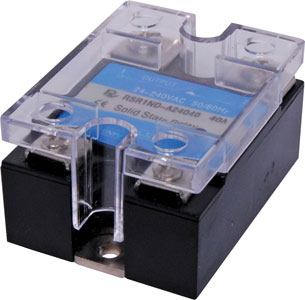
I used an ESR5002404000, purchased from WES Components, but there are other, more available, devices around. The Altronics S4416, whilst not from the same manufacturer, appears to be basically identical. This device is a RSR1ND-A24040, and can also be found on AliExpress. Of course, you can never be sure on AliExpress if the device is legitimate or not.
The interfaces to the Solid State Relay are really nice – with the device emulating an LED as far as the CPU is concerned. Feed it anywhere between 4 and 32 Volts DC, and you can control the output. On the output side you just need to put the device in series with the active, and it will work. Checking the data sheet for this part shows that if you want to control more than 4 Amps you will need to mount the device on a metal heatsink.
Once again, this device provides about 3500V isolation between the 230V side and the CPU. The big thing to take care of is that the terminals on the 230V side are potentially exposed, and touching them can prove fatal.
Spark Core
The core of this project is the Spark Core from Spark.IO. It is an Arduino like device with WiFi. We connected 5V to Vin, 0V to Ground, the Current Input to A0 and the Digital Output to D0. Whilst you can program the WiFi settings for this device over the air, we have discovered using the USB cable works best in a joint 2.4/5.8 Ghz environment like the Hack-A-Thon. The code, shown at the bottom of this post, was uploaded via their Web Interface.
Standards
Any construction like this should always be done to Australian Standards. Standards provide a great way to ensure your safety – as an old boss used to tell me – ‘What would you tell the coroner?’. In our case, probably the most important standard is AS/NZS 3100 that governs how electrical appliances are put together. It can be summarized in the following way:
- Don’t allow a finger or a pointed stick to touch anything potentially live without having to remove covers with a tool
- Ensure that all cables are secured and cannot come out
- Separate mains and low voltage as much as possible
- Ground exposed metal parts
- Be professional
It does say a lot more, and I am not even saying this is an accurate summation. You need to read the Standard, and if you don’t understand, talk to someone who does.
If you are using 230V plugs and sockets, you should comply with AS/NZS 3112. The easy way to do this is to purchase pre-constructed cords. In my case, I cut an extension cord in half.
It is also often worthwhile checking out AS/NZS 3000 to see what the Wiring Rules for fixed wiring say. The section on Extra Low Voltage gives some more hints at how to do things.
Parts List
We used a lot of parts in this project. The critical parts are listed below. Common parts such as diodes, resistors, capacitors, wire, solder, breadboards and cable grommets are not listed individually.
| Low Current Sensor | SparkFun |
| 5V 2A Power Supply | eBay or AliExpress |
| Solid State Relay | Altronics S4416 |
| Spark Core WiFi | Spark.IO |
Interfacing to the device
We interfaced to the device with HTTP requests though the Spark.IO interface. The following CURL commands could be used to control the device, once the hardware ID and access token are set.
curl https://api.spark.io/v1/devices/53ff73065075535137/power -d access_token=aacc -d params=on
curl https://api.spark.io/v1/devices/53ff73065075535137/power -d access_token=aacc -d params=off
curl https://api.spark.io/v1/devices/53ff73065075535137/out?access_token=aacc
curl https://api.spark.io/v1/devices/53ff73065075535137/watts?access_token=aacc
In the Hack-A-Thon, we actually built a UI around this. An experienced web developer should be able to work out how to do their own.
Code for the Spark.IO Core
Not many comments sorry… This is how the code was written for the event. We were thinking about having a local control button, but decided to concentrate on a Minimal Viable Product. Also, note that the device is POLLED only, adding load to the server software, but making things simpler.
int analogvalue = 0;
int powerOut = 0;

int powerOn = 0;
int powerOff = 0;

int powerControl(String command)
{
  if(command == "on"){
    digitalWrite(D0, LOW);
    powerOut = 1;
    return 1;
  } else {
    digitalWrite(D0, HIGH);
    powerOut = 0;
    return -1;
  }
}

void setup() {

    Spark.function("power", powerControl);

    pinMode (D0, OUTPUT); // Fondue Output
    pinMode (D7, INPUT); // Switch
    pinMode (A0, INPUT); // Power
    digitalWrite (D0,HIGH);
    powerOut = 0;

    Spark.variable("watts", &analogvalue, INT);
    Spark.variable("out", &powerOut, INT);
    Spark.variable("off", &powerOff, INT);
    Spark.variable("on", &powerOn, INT);

}


void loop() {

    analogvalue = analogRead(A0);

    if (powerOn != 0){
        powerOn = 0;
        digitalWrite(D0, LOW);
        powerOut = 1;
    }
    if (powerOff != 0){
        powerOff = 0;
        digitalWrite(D0, LOW);
        powerOut = 0;
    }
    delay(100); // Things work better with a 100 mSec delay here
}
Was this safe for a Hack-A-Thon
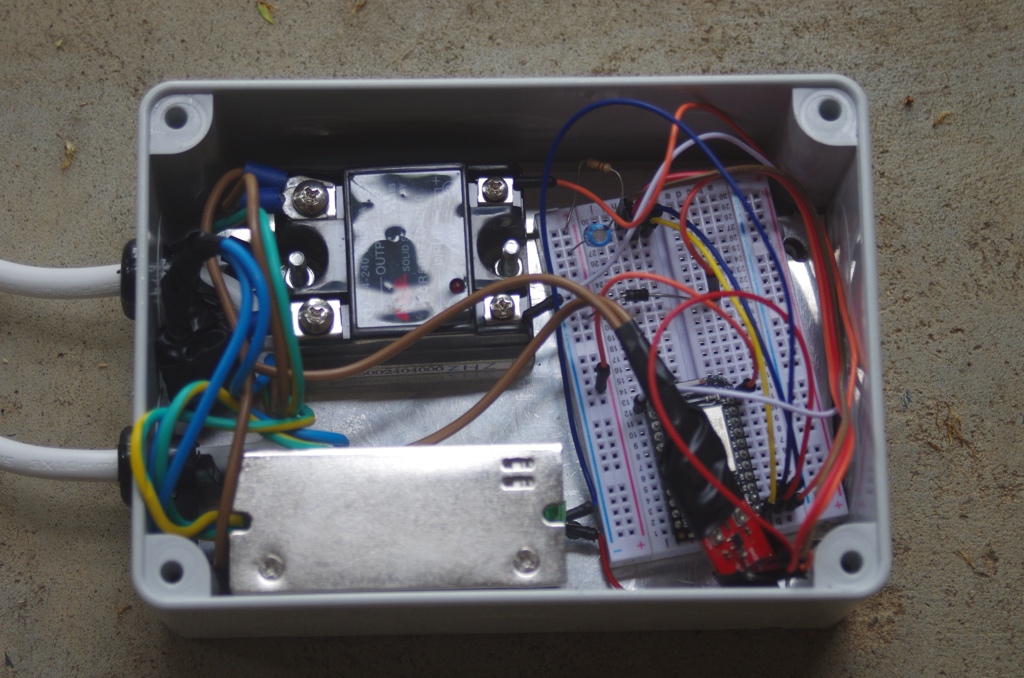
The safety of this project was VERY carefully managed. We could have got more points from the judges if we had 3D printed a custom case, but I felt that the Off The Shelf cases were actually good enough, and provided the mechanical strength that was needed for a project like this. Such cases are drop tested, proving that they will not fall apart. We used an off the shelf extension cord, and cut it in half to reduce the risk of cabling faults. And once I opened the packet containing the extension cord, I taped the pins so that no one could accidentally plug it in. Even the location of our table was carefully chosen, next to a wall reducing the people walking past.
We used a Safety Switch on the hardware, just in case. We hoped that it would not be needed, but if something happened, we wanted it to trip rather than cause anyone any injury. Probably most importantly, we did not operate the device with the cover removed. We did use the USB to program the Spark Core, but only with the device unplugged and with the core powered over USB.
 At night, I considered taking the device with me, but elected to disconnect it, put it in a box and tape the plug. This was not perfect, but if anyone was that invested in playing there is nothing I could do to stop them. Not that it would have done them any good since we did not leave the interface definitions overnight. And to remove the temptation we permitted the organizers to have as much fondue as they wanted! In essence, we operated with a safety plan in place, even if the plan was not actually documented on paper.
Consulting
If you are doing an Internet Of Things project and need assistance, please make contact with us, and find out how we can help you

